Shoot.
I heard it before I felt it – a rhythmic “clack-clack-clack” on the pavement from back of the Pajero.
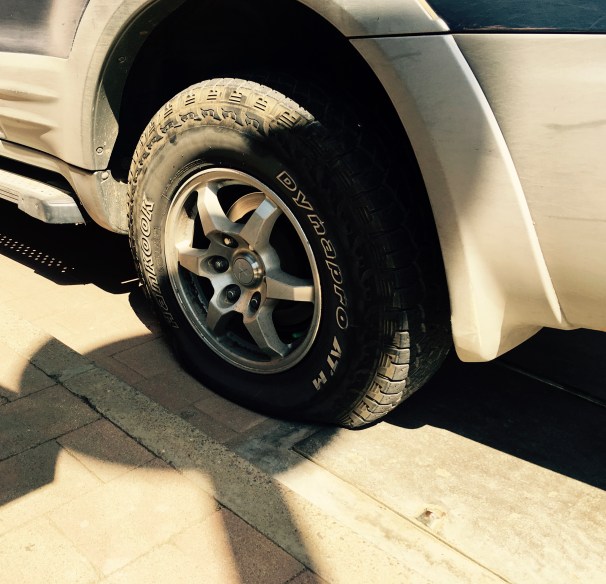
The noise would increase with speed, and soon I sensed the big Mitsubishi pulling me toward the shoulder of Mobuto Road near the University of Botswana. “I’ve got a leaky tire,” I thought. Being less than a kilometer from home, I pushed on slowly to the parking lot at our block of flats.
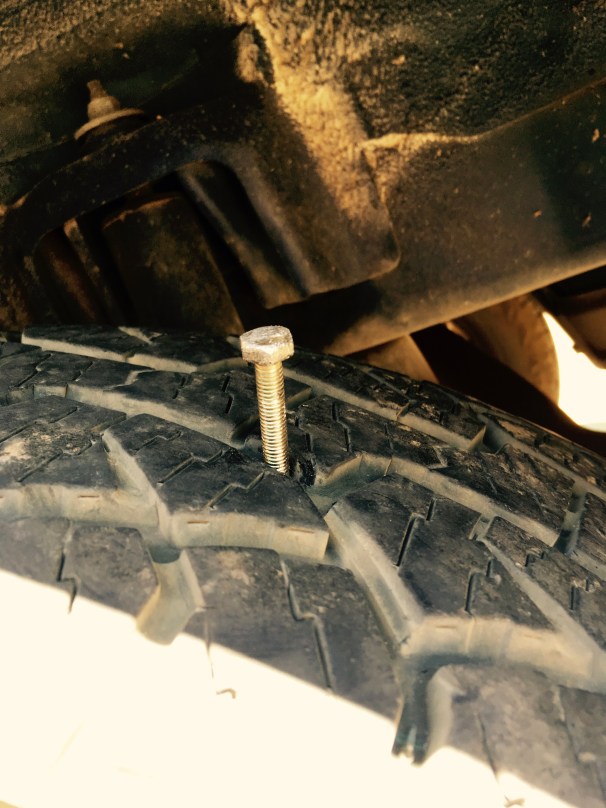
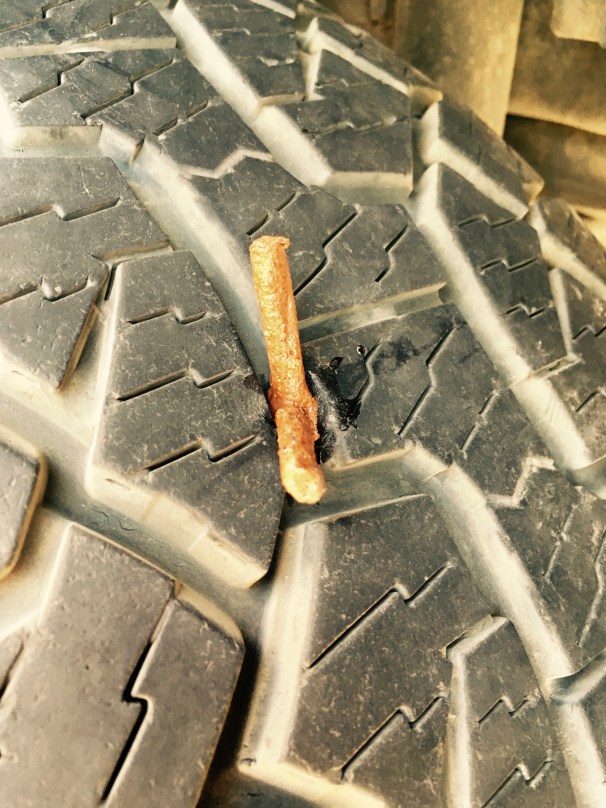
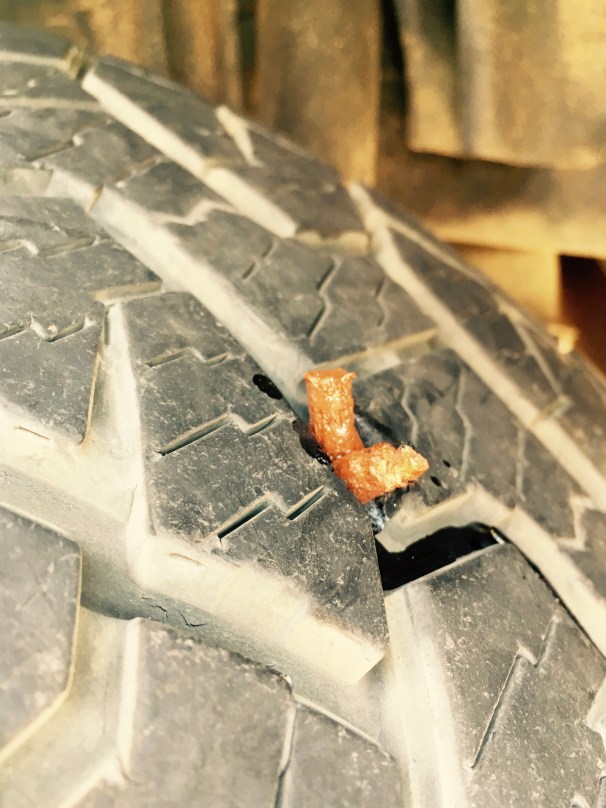
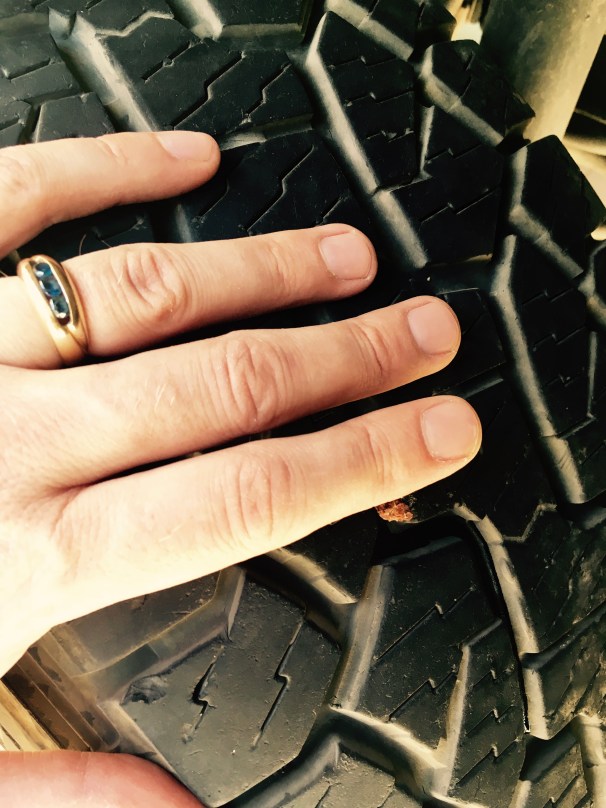
A quick scan of the Hankooks revealed a large hex-head bolt sunk firmly and deeply into the treads of the tire on left rear:
We’ll find out just how big that bolt was in a moment.
What to do now? Swap it for the spare? Call AAA? Not for this DIY’er. This was the perfect opportunity to get some practice using my tire repair kit in the comfort of my own parking space.
The always knowledgeable and entertaining Jonathon Hanson at Exploring Overland wrote recently about the “two tool kits that will (almost) breakdown proof your vehicle”. One of those two is the tire repair kit, which includes the tools and material required to plug a flat tire quickly, and permanently, in the field under certain conditions.
Tire plugs have been around for a long time, and anyone who can operate a vehicle jack and an air compressor can learn how to use them to repair a punctured tire. It’s an absolutely necessary skill to have when traveling in remote places. While extremely effective, and time-tested, when in doubt always have a professional check on your repair – it’s inexpensive insurance. The steps below outline the basic procedure for using tire plugs. There are more advanced techniques you can learn – but you should do that in a hands-on environment with the real pros. Note that tire plugs should not be used for sidewall tears or punctures.
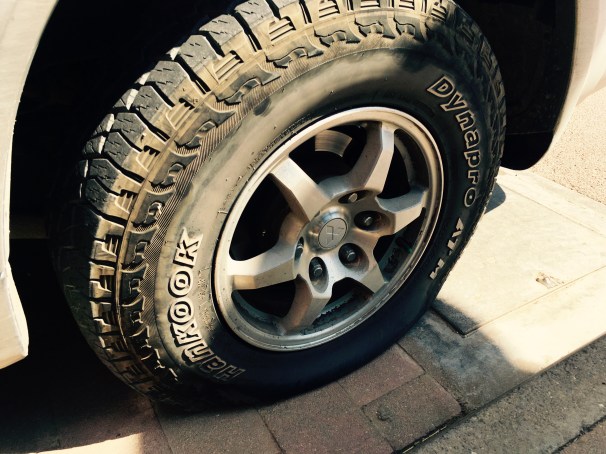
Follow along below as I bring my wounded A/T back to life.
Before we get started, remember, safety first. When working with sharp objects, compressed air, and jacked-up vehicles prepare yourself both physically and mentally. Eliminate distractions, and take your time. Lay out your tool kit before getting started, use proper hand and eye protection, and always stabilize a lifted vehicle on level ground as securely as you can (preferably on jack stands with wheel chocks). You will need four items to complete the repair: something to remove the object that caused the leak (pliers will work fine), an air compressor, a blade or snippers of some sort, and the tire repair kit.
The first step is locating the source of the leak – in my case, this was not difficult – and positioning the offending object in a way that gives you easy working access to it. Smaller objects may require more searching, and removal of the wheel from the vehicle. This repair procedure can also be completed with the wheel on the car, as I did.
After jacking up the vehicle, evaluate the size and position of the puncture. Any leak that is too close to the sidewall (within the last row of tread blocks nearest to the sidewall), or any larger than 1/4” in diameter should be repaired by a professional.
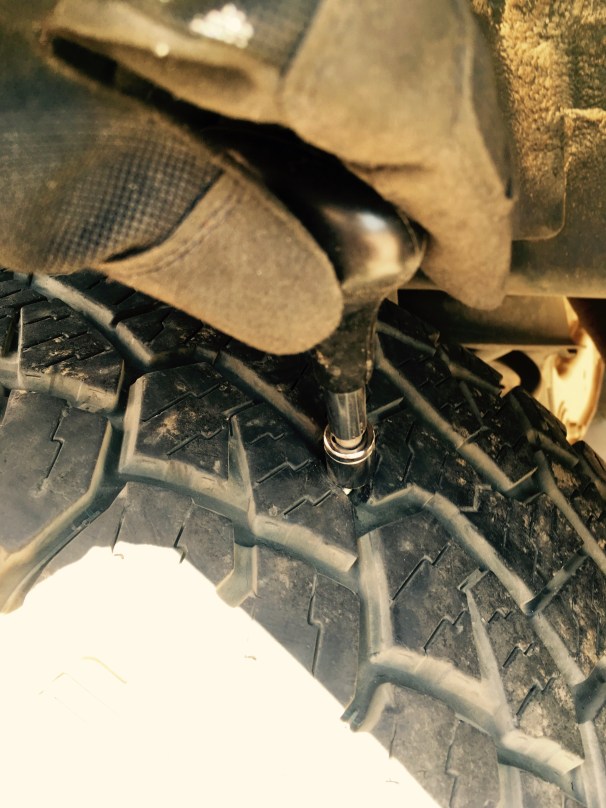
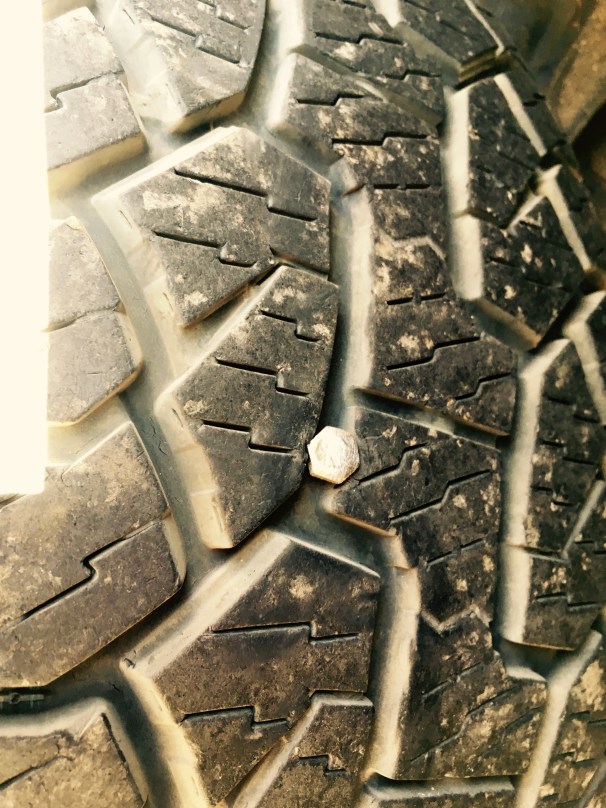
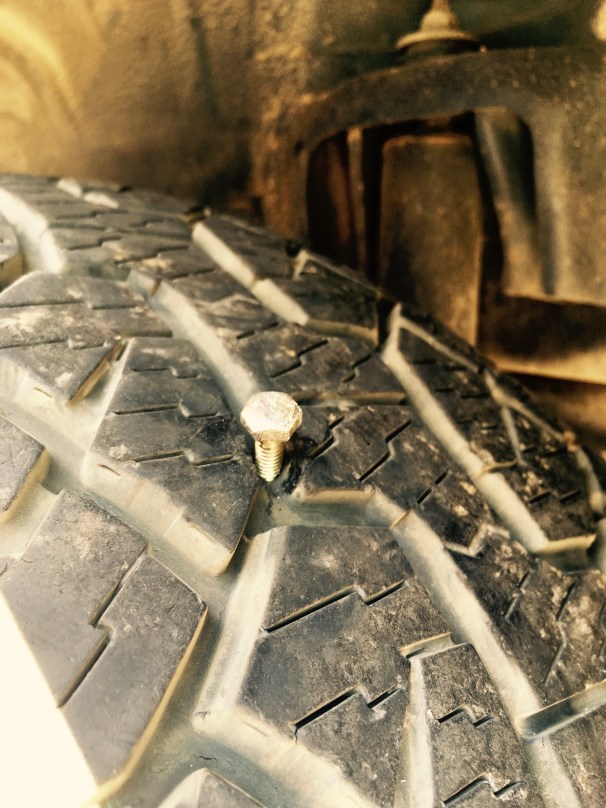
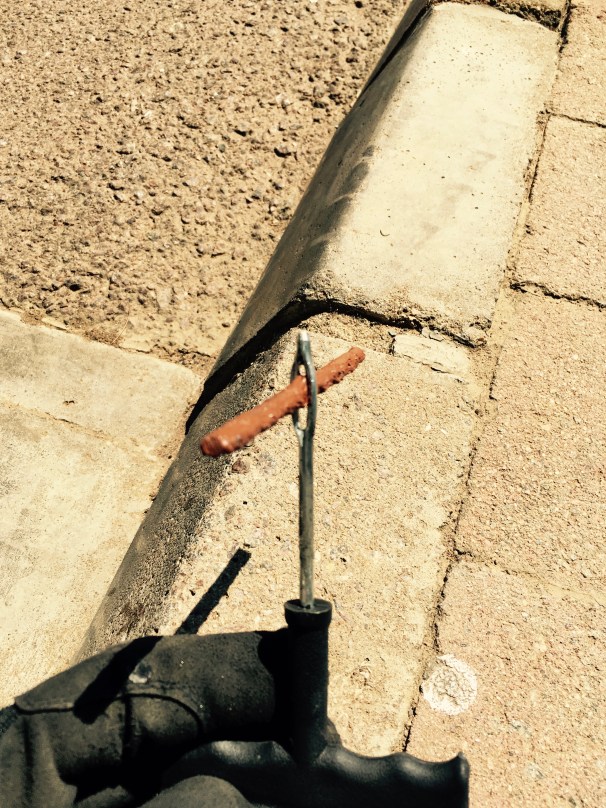
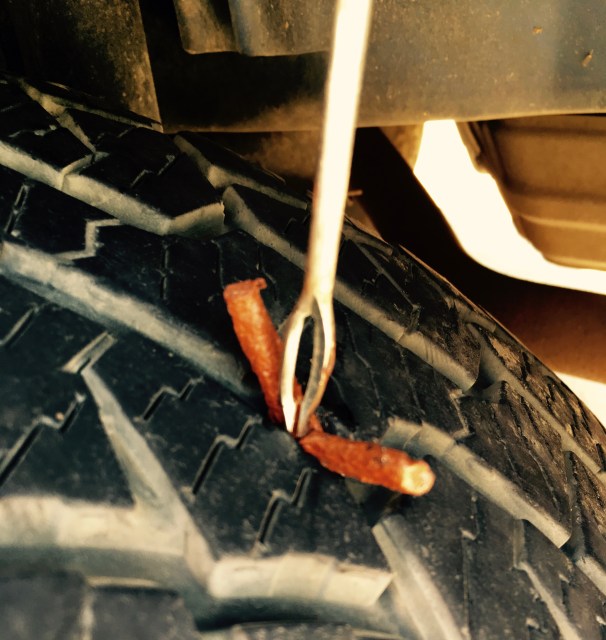
In the case of a smaller puncture, it may be useful to mark the position of the hole with a pen or piece of tape so you can easily find it after removing the object. Using pliers, carefully remove the object, or in this instance, I deployed my socket set to simply unscrew the bolt from the tire.
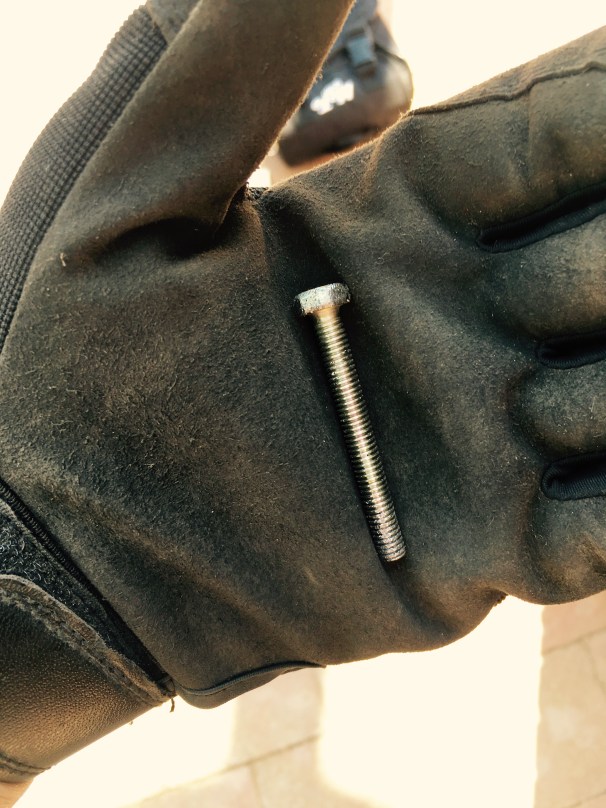
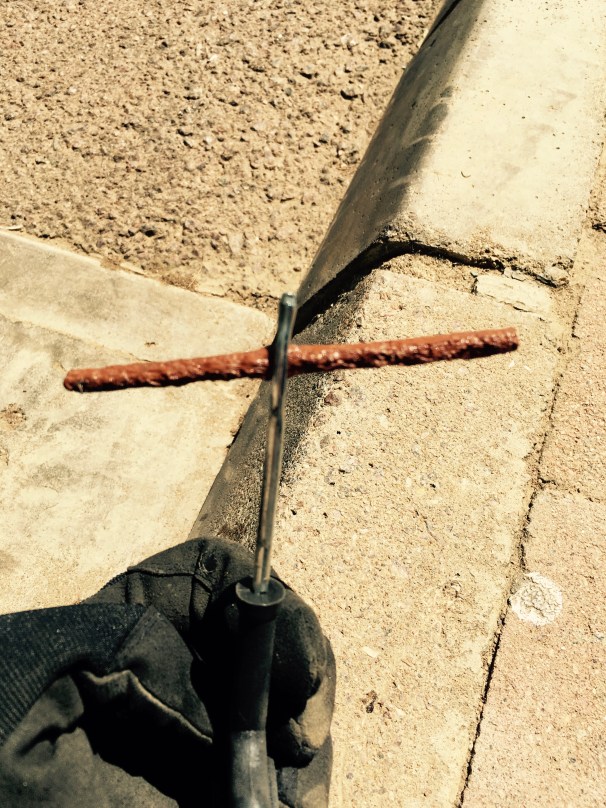
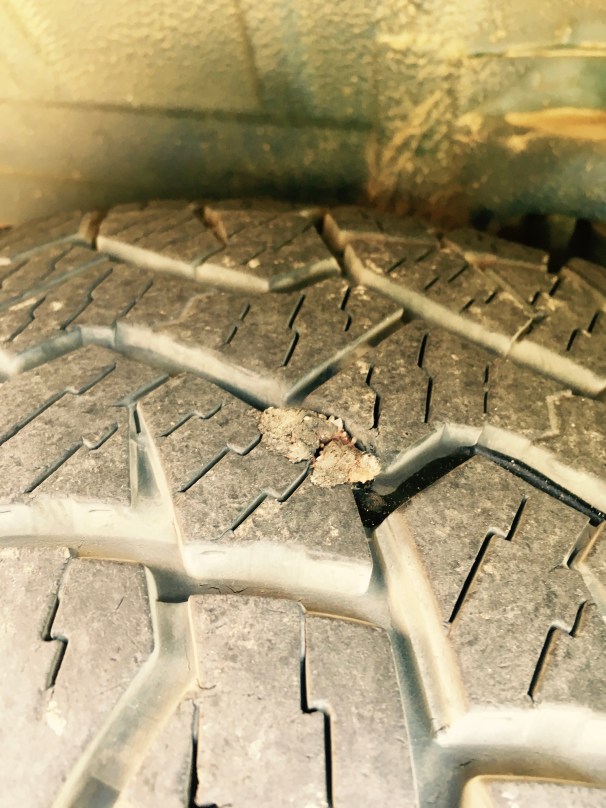
Look at this thing!
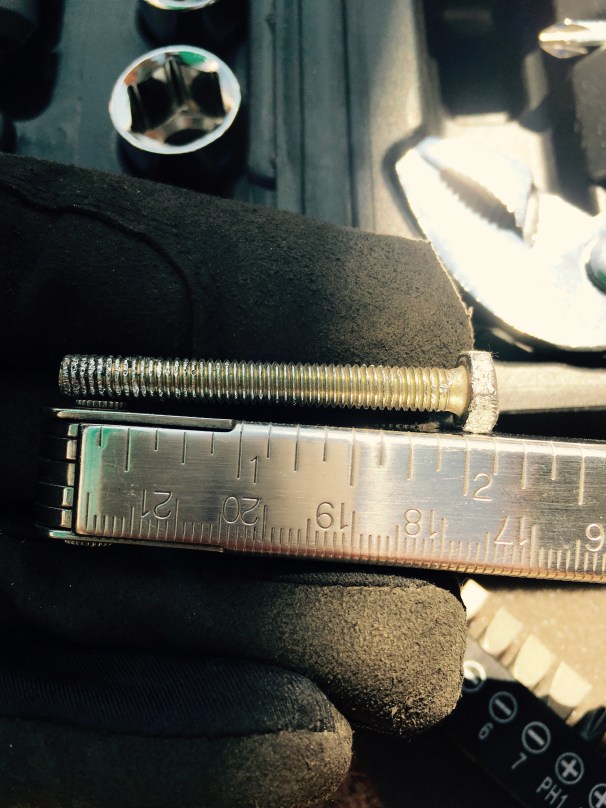
A 2-inch 10mm coarse-thread bolt. I must have really hit this sucker head on.
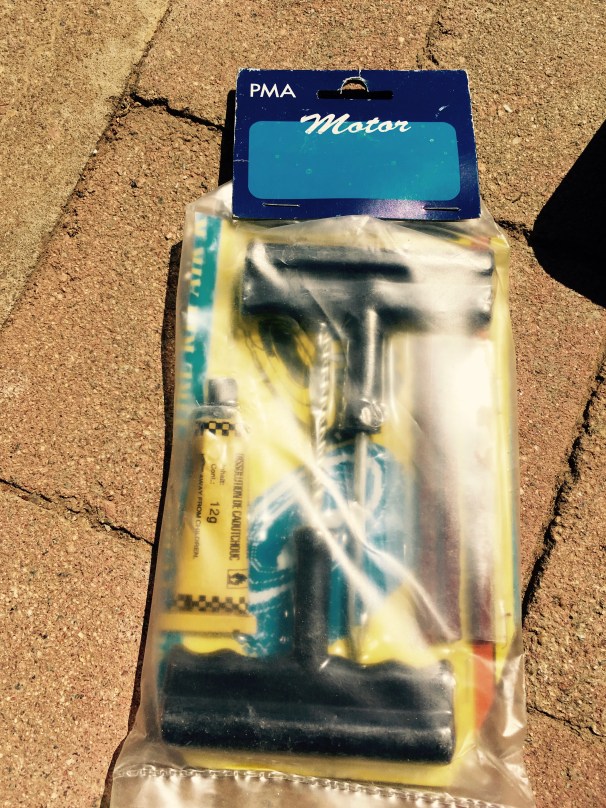
Here is the tire repair kit. This is a basic model, which you can find for less than $10.00. There are others available that are considerably more well-equipped (and expensive).
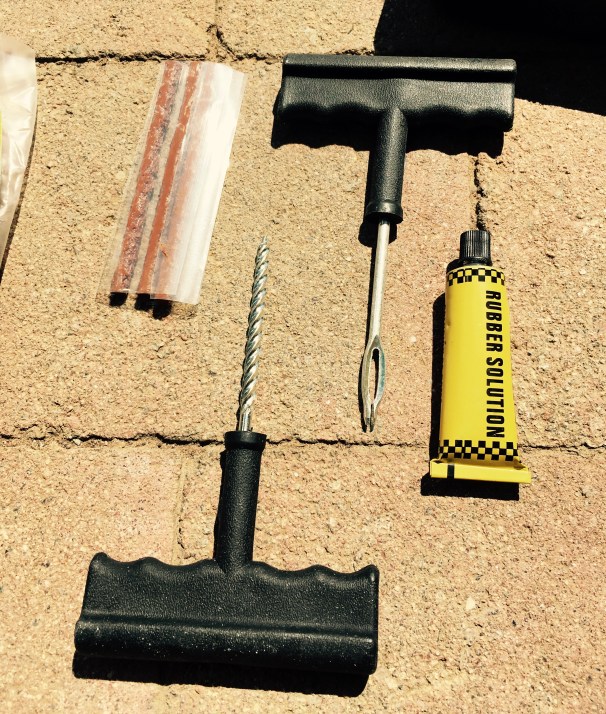
Any tire repair kit should come with the following tools, from left to right – vulcanized rubber plugs, a t-handled tool that shapes and roughens up the hole, another t-handled tool that threads the plug into the hole, and some kits include tire prep solution to lubricate the hole and activate the vulcanization process.
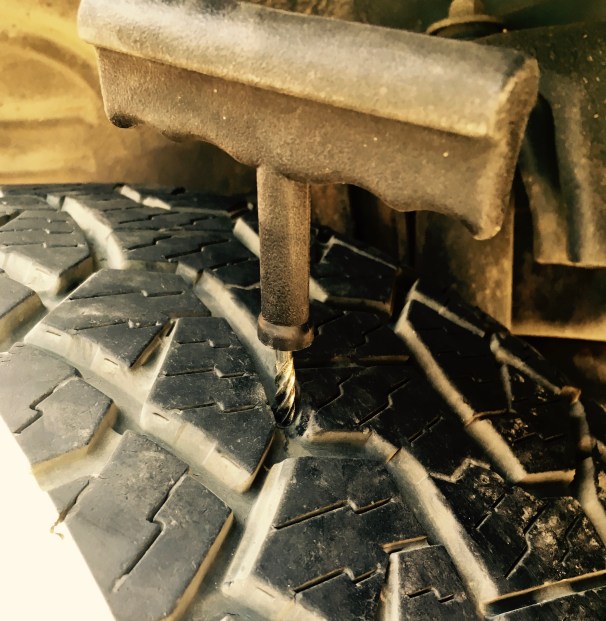
Once the object is removed, plunge the drill-like tool into hole, moving it up and down a few times to round out the hole, and roughen up the sides so the plug has an effective surface to grip onto. Don’t go crazy here – no need to make the hole any bigger than it needs to be, do it just enough to fit the next tool into the hole.
If your kit comes with rubber solution, now is the time to prep the hole with that. Then, thread one of the weird, sticky rubber plugs into the “eye” of the needle-like tool.
Make sure the plug is centered in the eye of the tool, and the tool along the length of the plug.
Push the plug into the hole, until about 1/3 of the plug remains showing. Slowly pull the tool out, and the plug should slide through the gap in the bottom of the tool, remaining stuck in the tire.
Here’s what it should look like when you’re done.
Add another small amount of rubber prep solution to the outside of the plug, and then trim the excess to within 1/4” inch of the tire tread.
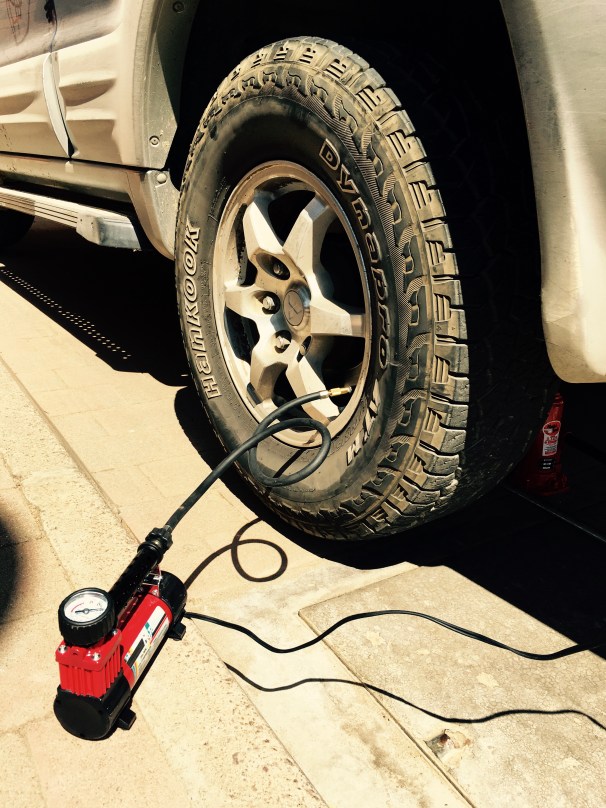
Fire up your air compressor, and inflate the tire to the recommended pressure for your vehicle (located in your manual, or sometimes on a sticker in the door jamb) and your road conditions.
After the tire is inflated, using a a little bit of water on your hand, check for leaks around the repair.
Carefully lower your car off the jack or jack stands, and slowly test drive the repair. The tire-plug is a fairly fool-proof fix, and, through the magic of vulcanization, once complete, will be bonded permanently to the tire. It should last for the life of the tire. The repair, if done methodically should only take you about half an hour. Now you’re back on the road!

Very professional. And a new skill.
LikeLike